Sunday 7 October 2012

The animals came in two by two HURRAH!

I would like to share some of the boxes made for the Chilterns Craft Show. Without further ado...


1. Letter Box


All credit goes to my girlfriend for this one...'why don't you make a box to hold letters in? they only end up cluttering my nice tidy drawers. Hint.' Good idea. 


The oversized frame and panel lid is designed to mimic the look of a letterbox whilst the interior holds a stack of standard business size envelopes. An extra 30mm on the length is allotted for finger space - perfect for digging out buried bills.


All joinery is handcut in the traditional manor. Through dovetails on the box compliment corner bridle joints you see on the lid. I adore working this way. 


Bottoms are lined in blue suede to match the interior. Two main benefits come from this; Foremost, protection - not for the box but rather the surface it is to sit upon, no nasty marks left behind. Secondly, friction - the box will stay put when you open the lid.


Said lining on show. There is nothing quite like the feel of close napped suede. The main box elements are constructed from American Black Walnut with a solid American rippled Cherry panel. It has the most fantastic figure, some of the best I have seen on cherry. Each panel was hand thicknessed, a necessity to avoid the machine planer eating it. Om Nom Nom.


This is my own design of box-stay (a device for keeping an open lid poised at 95ยบ). When the lid is closed the phosphor bronze cable glides into a plastic (thus frictionless) sleeve let into the box side. This idea came to me ages ago and took quite a few prototypes before I nailed it. Elegant and simple, it does the job with a minimal feel.

I still have one of these for sale, If you are interested please drop me a line. £220 delivered.

-

2. Drawer Cube


This pair are made in exactly the same way a traditional cabinet drawer would be made. The design is intended to amuse those with a knowledge of fine furniture, even so they went down a treat with the public simply as objects in their own right.


Two features offer this mimicry, the first being differing dovetails, secondly how the bottom is attached. Two grooved components known as 'Slips' are glued to the sides. These hold the bottom in place, secured with a method called 'slot screwing'. This slot allows the timber to expand and contract according to humidity changes without distorting shape of the drawer. 


Drawer fronts almost always have 'lapped dovetails' connecting the face. A lap is the thin section you see at the dovetails end. Anyone who has tried to do hand-cut dovetails this fine in solid burr will appreciate the effort involved....worth it? Absolutely. Drawer backs are always jointed with through dovetails (so called because they show through on both sides).


Pivot lids are a simple affair, they swing up on two fine stainless steel pins. Care must be taken when fitting though - if they are skewed even slightly it's glaringly obvious. Note the matched grain. 


Lids to attention. Crikey the saturation levels on this photo are outrageous!


My favorite front is the right box, it looks like a bomb went off pushing all the grain outwards. English Yew was used for the back, sides, lid and bottom, the slips are Bog Oak and the fronts Horse Chestnut burr. I find it interesting that although there are thousands of Conker trees all over England, you rarely see it's timber in furniture production. Maybe it's to do with how delicious wood-eating insects find it...

For sale as a matched pair. P.O.A

-

3. Knot-top


My Parents garden has the most fantastic Contorted Hazel tree growing within. As a kid I would stare up, trying to trace the magic branches to find its secret. I did eventually: grafting scion to rootstock, however, this didn't make it any less magical to me.


Every so often my dad sacrifices some branches to the Gods in a ritual known as pruning. I collect the branches, snip off the more useful/interesting sections, boil them, remove the bark and leave to season. For these boxes I wanted a simple understated form to accentuate the Hazels curves.


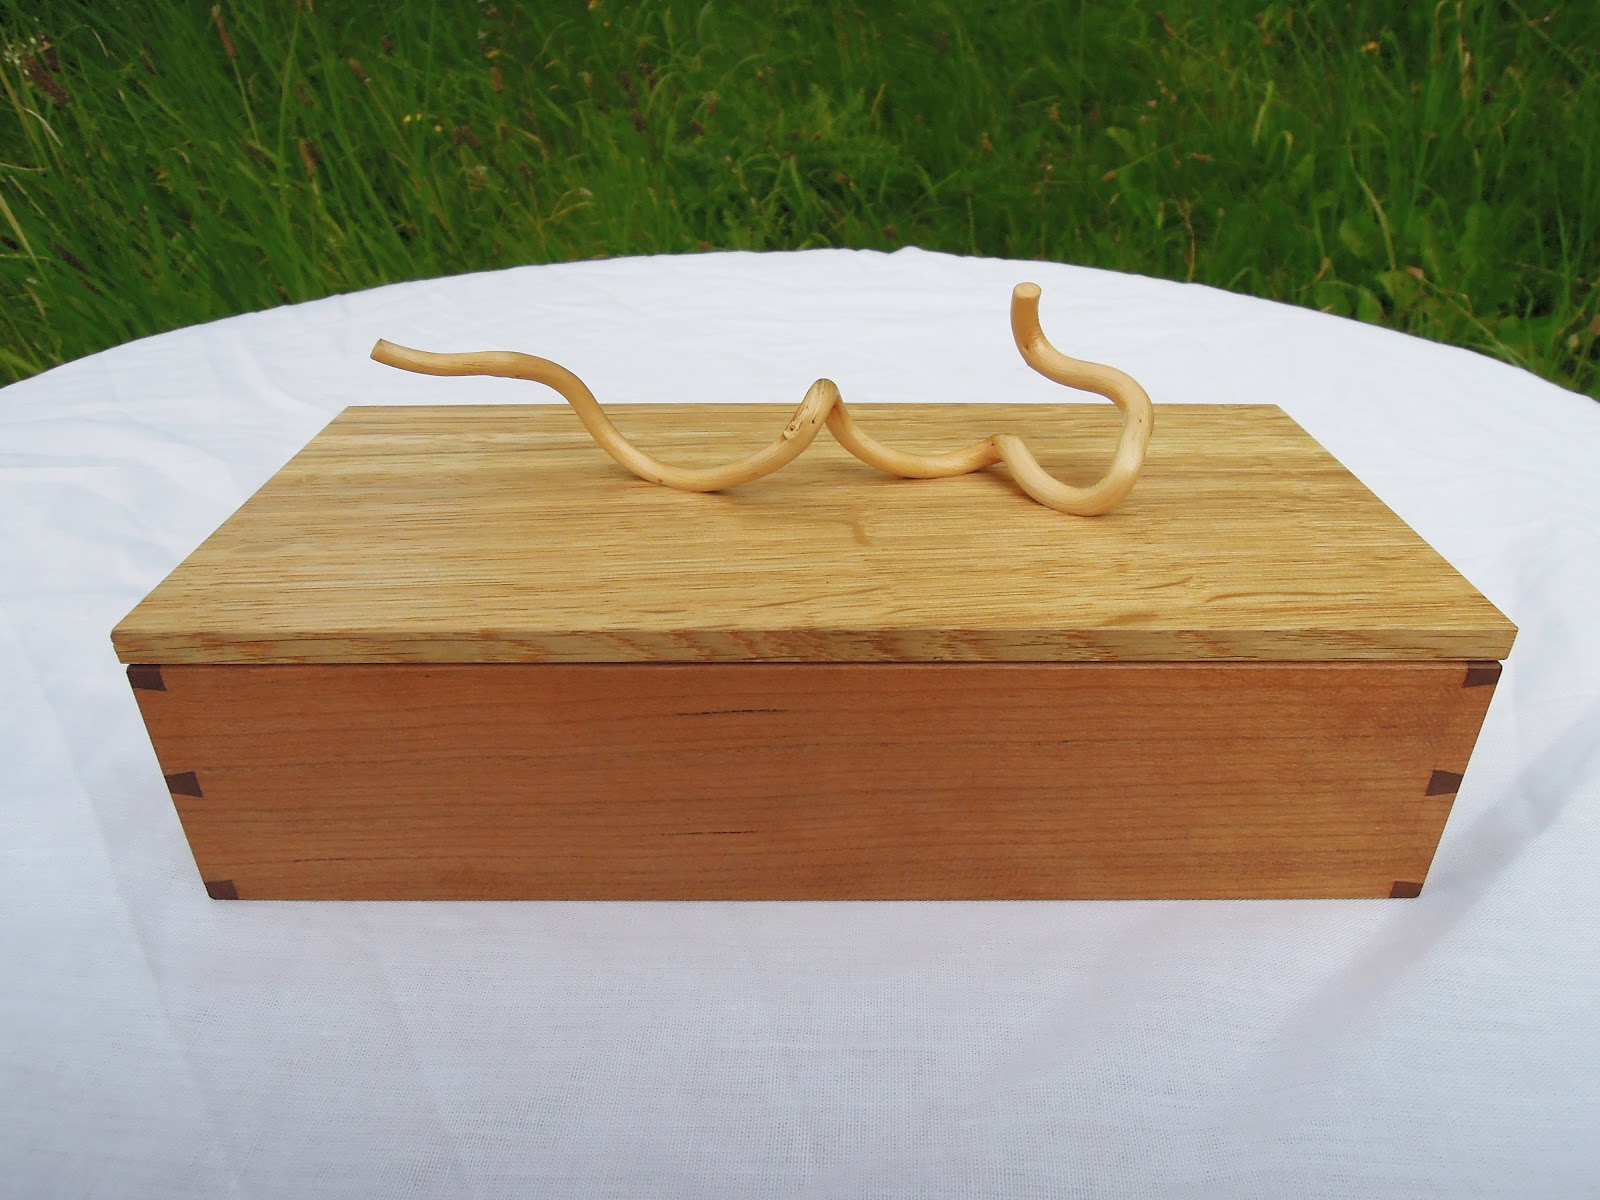
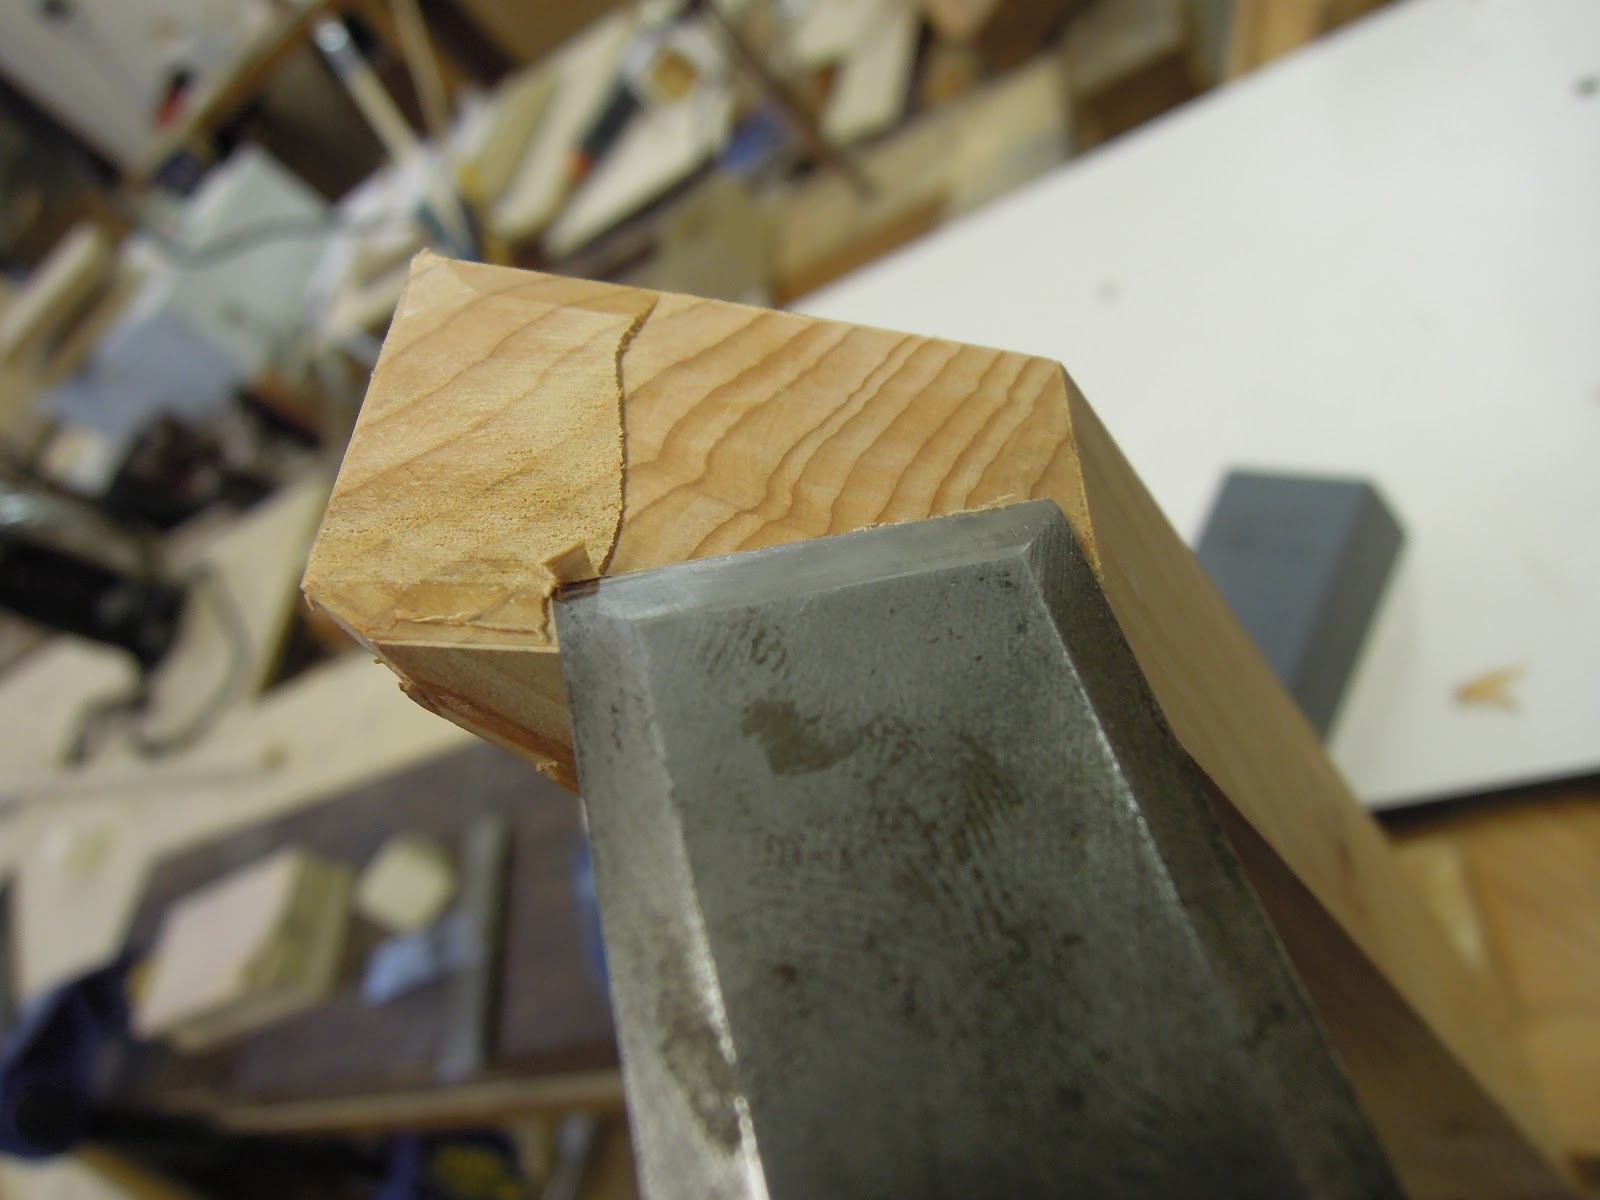
The effect is quite pleasing. You can make out the heavy chamfer creating a definite visual break between the lid and box.


Once again hand cut Through Dovetails. It's hard to tell from these photos but the bottom dovetail is actually wider than the top - an experiment into perspective: do the two look the same when viewed from anything other than dead on, i.e. from above? The jury is still out on that one, I suspect the overall difference is negligible. 


Not just a pretty face - structurally sound to use as a handle. Each Hazel length has flats where it contacts the lid, these were glued with the strongest adhesive available before being secured with tiny brass screws let into the underside.


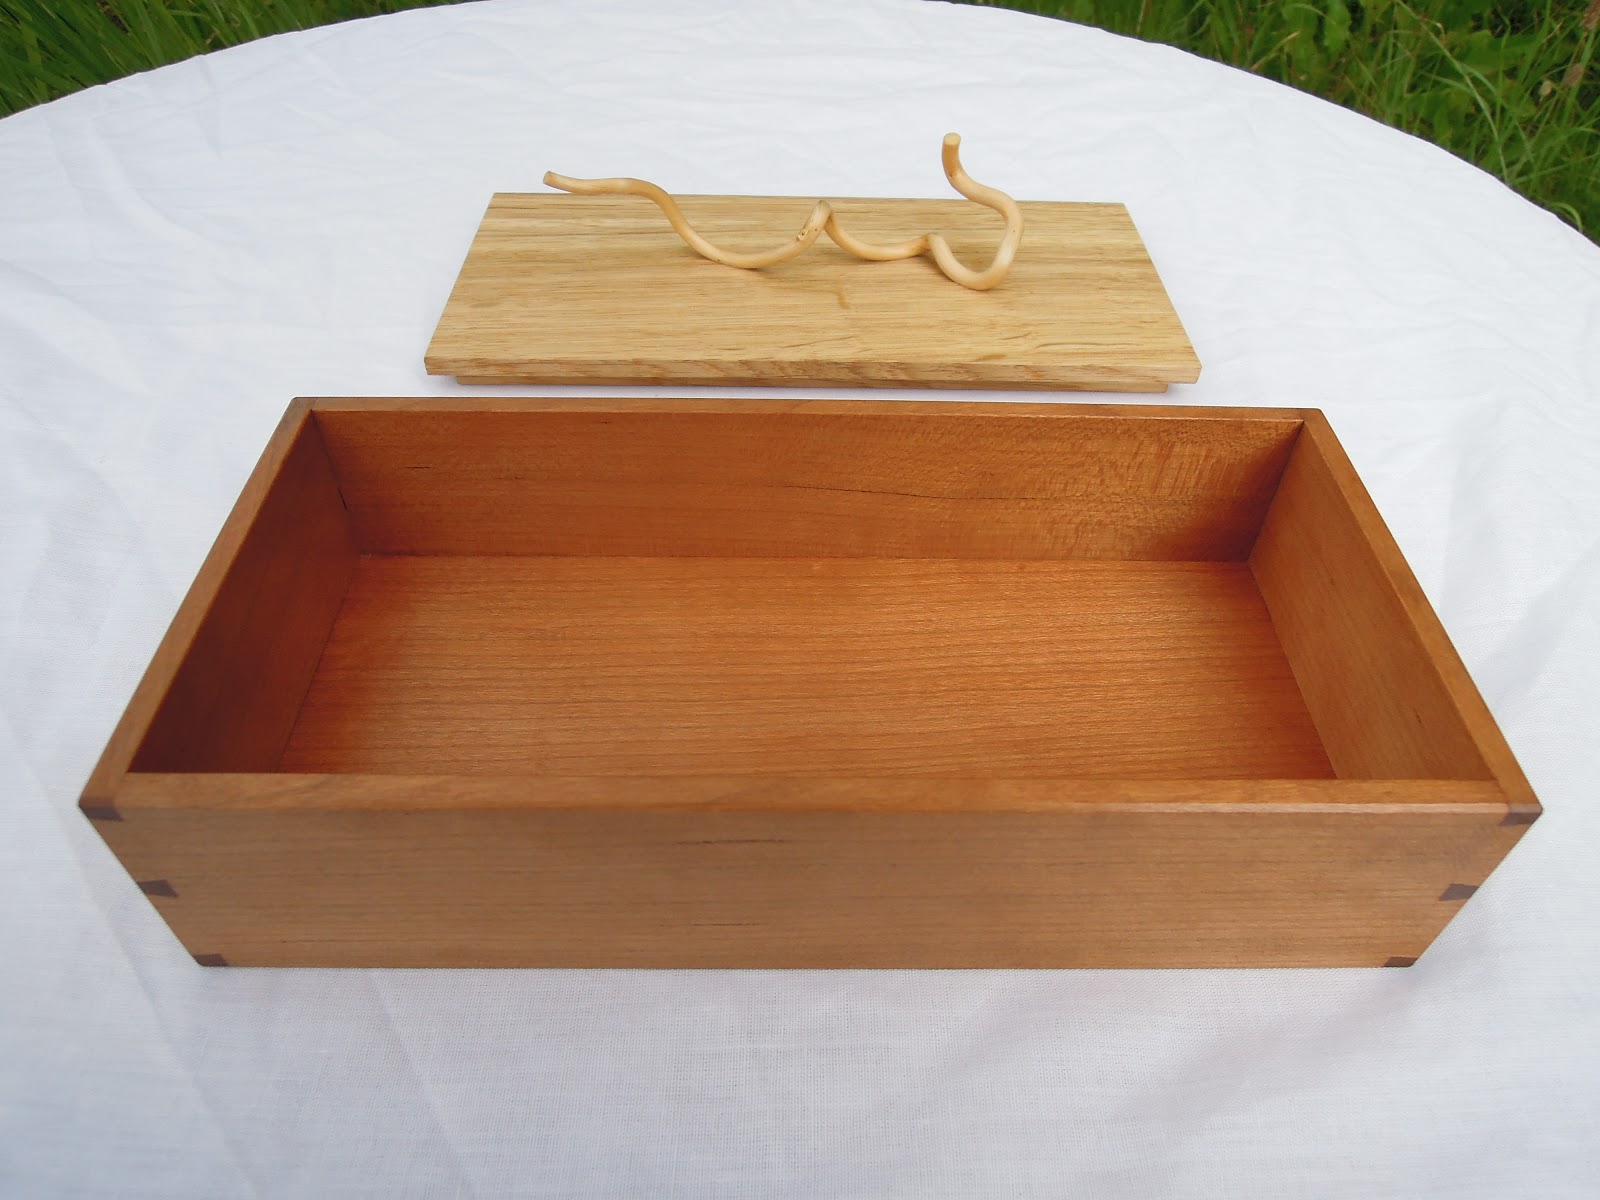
The Hazel you know about, the sides are made from quarter-sawn American Cherry, the base veneered in American Cherry and the top quarter-sawn Japanese Oak. 


A simple oiled finish (three coats oil, two coats wax) sets them off nicely. Note the fine closely spaced growth rings on the lid, typical slow growth induced by Japans climate.


SOLD.

More to come.

N.B. I will be on holiday for the next fortnight, thus uncontactable.

Chilterns Craft Show

Wow has it really been that long since my last post? My apologies, I started this blog determined to keep it updated every fortnight....then work became busy...then hectic....now I have a brief reprieve between commissions.

Exhibiting at the Chilterns Craft Show was thoroughly enjoyable, meeting new people, talking to fellow makers, people in the industry and new clients. All in all very encouraging, I'm glad so many people are supporting British Craft - on the whole we have so much to offer.


Our marquee was labeled the 'Graduate Show Area', for all exhibiting within have graduated from various universities in the last two years. The marquee was set up by couple Richard & Patricia of Informed Design who are absolutely devoted to promoting quality british craft. Informed Design is a collective of new and established designer makers producing the highest quality work in all manner of mediums, if your interested please follow the link.


Setting up the marquee. The chap you see before you is Harry Gleaves a talented furniture maker from the university of leeds, now working for a highly reputed firm in High Wycombe. Harry had his Seed of Life Table on display, an excellent piece incorporating a steam-bent Oak under frame and Sycamore inlaid top.


I had a number of pieces on show; a collection of handmade boxes, wooden planes, Embrace, Lowback Armchair, and an Ash Jardiniere (I may do a post on this at a later date - quite an interesting piece to make). One of the best features of our tent were the two 'room sets', as the name suggests these areas were laid out to simulate a fully furnished room. More is the pity I'm missing many photos from this fair, room set pics included.


A rather gormless looking Oliver discussing the merits of wooden planes. A surprising number of people understood the benefits of working with a well tuned woody, usually I get the delighted response 'you mean you actually use them?! '.


Scroll wedged smoothing plane, small size, in English Boxwood. The iron is made by Herring of Sheffield and I have to say; not impressed, it's a more recent vintage iron (c.1950 ?) sadly the quality just isn't there.


Traditional English pattern mitre plane also in English Boxwood. The iron in this one is homemade, on reflection it really didn't need to be 1/4" thick - it takes ages to sharpen, but boy does it add some welcome heft! A plane best used for fine trimming end grain jobs/shooting in.


Miniature finger plane in Brazilian Rosewood, cannibalised Stanley iron. I have made quite a few of these with various sole profiles for Luthiers. At 1 7/8" long and weighing just over an Ounce, they excel at delicate shaping tasks.


This beautiful bowl was made by Ceramicist Jane White. The outside is reminiscent of fired bricks with the most amazing texture.


Jane had to fire the piece three times to get the colours right. I wanted it so badly but couldn't afford it at the show. I spy with my little eye something beginning with future commission....


During the few quieter moments we got a chance to have a wander. The grounds were stunning with many mature trees surrounding the site. Luckily the weather held up for the most part with only one squall, brief but violent with forked lightning to boot!


If we did see you there many thanks for coming along, I hope you enjoyed our work.

Sunday 2 September 2012

Shrink Ray

Thought I would share a few interesting new tools received as a gift from my Aunt and Uncle. Clearly handmade, the level of detail and workmanship involved is astounding. I would love to meet whoever made them, for they evidently take great pride in what they do. While they may not be on Paul Hamler's level, they capture the spirit of craft perfectly.


This Lump hammer rests on a five pence piece, about the size of a Dime to those across the pond. Note the facets along the cheeks tapering from the centre out towards each face, identical to the real thing. There is even a short pencil line simulating a wedge driven into the eye!


'1250' is stamped along the blued top in minuscule lettering, could this refer to the full size weight? I know you can get lump hammers with 1250g heads so it seems plausible.


Proportion wise this Rip saw is the least accurate of the four, but nevertheless a lovely miniature. The wooden components on each tool are made in Beech, strange considering miniature makers usually use a tight grained wood i.e. Pearwood because the grain scales down so well.


Teeth set in a rip profile. Please ignore the shiny spots...maybe I got a bit carried away trying to rip a scale-sized board of lime. Ahem.


When I first picked this little file up I thought 'how on earth have they stitched teeth into something this small?!?' It wasn't until I had taken these pictures the burn marks around the tang became visible...so the edge was done on a grinder. Why? Ah, because the steel was too hard to cut with a file. Logical conclusion: It started life as a needle file.


A darn good idea it is too. Fine double-cut teeth of a needle file translate extremely well, they are after all exact scaled copies of their bigger brothers. If this file was 'blown up' to full size it would probably be a Coarse. 


This one just has to be my favourite. As a self confessed plane-nut it really really floats my boat! I'm more versed in western planes but I believe this type to be a Continental horned smoothing plane, right handed. 


Apart from the fact I love all things planey, you can actually take it apart! This is where the skill of the maker shines through quite literally - the section cut out between the bed and the abutments are so thin light passes through them. Even the Iron is ground at an angle that looks about right.


Having learnt my lesson from the rip saw fiasco I dare not use it on anything, but my oh my how I'm tempted...the wedge is a perfect fit and the iron can be set and adjusted (using a conveniently sized lump hammer) as you would on a full size plane. One day.....


Next Post : Chilterns Craft Show.


Wednesday 15 August 2012

Lowback Armchair


This is only the sixth or seventh time I've worked in yew. Every time it gets me.


Yew trees often start life as several closely spaced saplings which, given enough time and the right conditions, merge together into a single irregular bole. This does beautiful things to the timber lying within, however, beauty has its price. Bark inclusions, deep checking, shakes, live/dead knots, stresses etc. are all too frequent. Consequently the wastage factors are astronomical, the lowest Iv'e gotten away with is near 250%. Two highly respected makers (we're talking multiple Guild Mark level) informed me on the finest work work they allow around 400% from the board. Ridiculous as this sounds even with my limited experience I can well believe it.


The second problem arises after you finally have workable components cut. Yew saws well, but resists machining with every fibre of its being (aha) which is why hand tools are a must. I saw the settled components close to finished dimensions before hand planing them to final size, finishing up with a high angle infill smoother or a scraper depending how difficult that particular surface is feeling. The photo above is a good example of man versus machine. For the acute curved sections I use files, rasps, gouges, knives and shaped batons with coarse abrasive paper attached. When you get it right though...boy does this wood sing!


The all important mock up, helping me refine the ergonomics and work out the details. This is actually the second mock up, the first wasn't quite there. Designed to took 'well planted' at the base rising up to 'open and inviting' towards the top, with subtle curves and details to make it less industrial looking.


Yew end grain is surprisingly uniform to work providing the tool is sharp. I find it quite similar to paring boxwood so far as texture goes, though obviously not as hard. For a small joint face such as the mitre above I knife a boundary line, bevel the far edge to shorten the fibres (shorter fibers = weaker = less likely to chip the edge as the chisel follows through) then work my way up the face taking a little at a time. It's surprisingly quick and if you start the cut right successive cuts will follow the datum set by the previous.


So what do you do when your local supplier runs out of dominoes? Be thankful you have an appropriately sized hollow! I know I know, those who know me say I'm a traditionalist in my methods and it's not a mortice and tenon, but with rails this narrow most of the strength is via bracing that the arms and corner blocks provide. In the end I couldn't justify the extra work for little gain.


Simple glue up. The correct arm positions were plotted on a thick piece of MDF and secured with hold-downs. The benefit of this is two fold; ease of squaring everything up, ease of keeping everything flat. Note temporary cauls allow for correct clamping pressure direction, Hot-melt glue is your friend!


A similar set up for the frame, this is the eighth chair I have made so far and without out a doubt the least stressful to glue up. Fifteen minutes tops.


Temporary tacking the Calico cover which will form the seat pads shape. I took my time over this to make it as even/firm as possible. The finish cover is a rather gorgeous purple/pink marbled Kidskin suede barely big enough for the job, It had to be stretched in small increments over the course of a 
week.


I decided to try a new finish on this one, Its a hybrid between shellac and a modified Sam Maloof wiping varnish recipe. It gives it a super silky feel that also brings out the clarity of the wood, both colour and grain. Eminently suitable for Yew. 


Success!